
Add a client
Have the business name, tax identifier, and contact details ready.
 View full size ↗
Create the file
Link to section: Create the file- Open Clients and choose Add account.
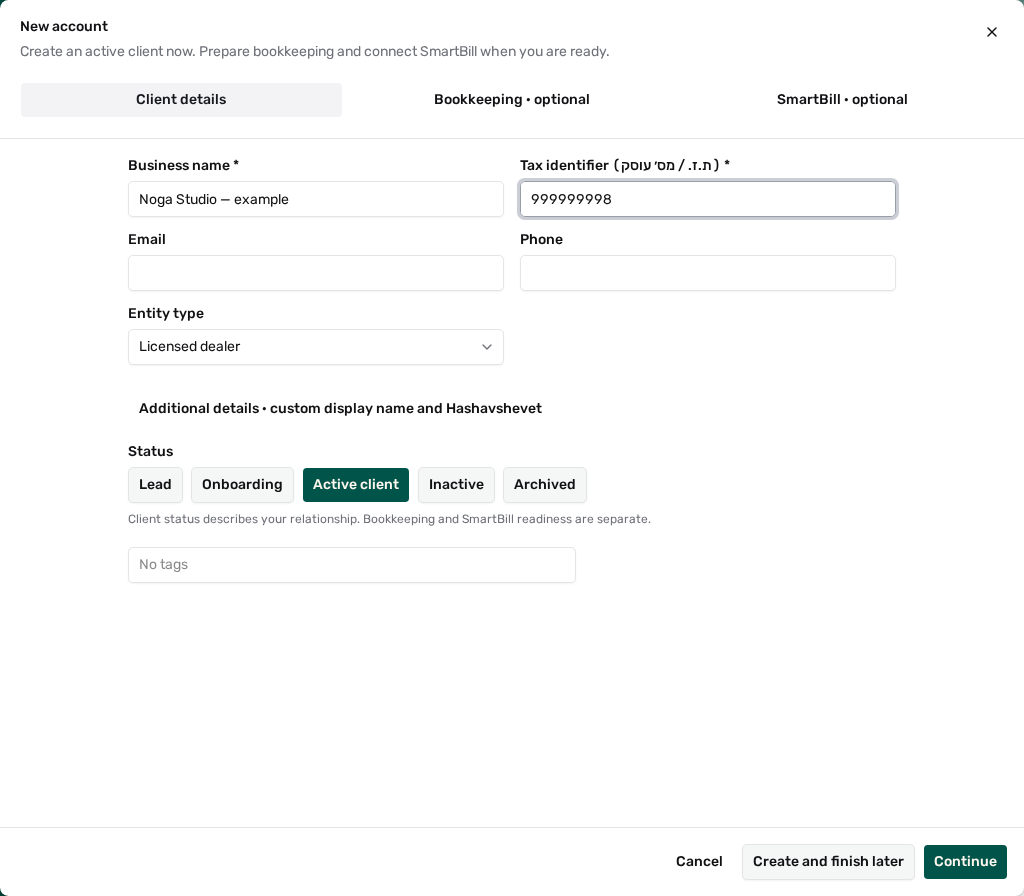
- Enter the Business name and the Tax identifier. These are the only two required fields. Correct format or checksum errors. If Office finds an existing match, open it instead of creating another file.
- Choose the Entity type and add an email and phone if you have them. A separate registration-number field appears for relevant entity types.
- More details opens the status, tags, a custom display name, and the Hashavshevet company ID. A new client is created as an Active client unless you change it.
- Choose How the books start (see below) and press the main button. The button says what will happen: Create client and import structure or Create client.
Nothing is saved until you press the main button.
In an office that does not keep tax details for its clients
Link to section: In an office that does not keep tax details for its clientsAn office that does not keep books or tax details for its clients, such as a law firm, sees a shorter form instead of the screen above:
- Open Clients and choose Add account.
- Enter the Display name. It is the only required field.
- Add the Legal name, an ID or company number (optional), an email, a phone and tags if you have them. An ID number that is given is still checked, and two clients cannot share one.
- Press Create.
There is no entity type and no books or SmartBill part. Two clients may have the same name, so check the list before you add one.
How the books start
Link to section: How the books start- Import from previous software (the default): the client is created and you go straight to the import page. There you confirm the bookkeeping method and currency, and review the source and mappings. The file supplies the starting chart, with its keys; no Office template is added. Read the structure import guide.
- Ready structure: choose the Structure source (system defaults, one of your office’s templates, or a client already set up) and the method, single-entry or double-entry. The client is created with its books ready. Review and customize opens the structure for editing before you create, and is optional. If the structure needs attention, the button becomes Create and finish later, and you finish from the client page. Read the bookkeeping setup guide.
- Later: only the client is created. Set up the books any time from the client page.
The client’s SmartBill account
Link to section: The client’s SmartBill accountThis part appears when your office opens a SmartBill account for every client, for an active or onboarding client.
- Send the client an invitation to SmartBill is on when you entered an email: the invitation goes to that email as soon as the client is created. Turn it off to open the account without sending anything, and send the invitation later from Connections on the client page.
- Without an email there is nobody to invite. The account opens when you choose who to invite, from Connections on the client page. Adding a contact or an email later does not send an invitation by itself.
- Who pays for the account appears for owners and admins when a seat is free in your office’s allowance. The choice applies to this client only; your office’s default stays as it is in Plan and usage.
An office that manages its SmartBill connection itself sees Connect to SmartBill after creating here: after the client is created you create its SmartBill company or link an existing one. These are different actions, so read the preview before confirming. If the connection fails, the client file stays, and you retry from Connections.
Check the result
Link to section: Check the resultSearch for the client in Clients and open the file. Confirm the name and identifier. Link the right contacts and ask the manager to check who can access the file.